
Welcome to my article series ‘Behind the algorithm’ where I try to write about the work that gets into the artwork. I started this series for my generative prints but recently I dipped my toes into generative art NFTs on fxhash where I launched two generative tokens, “Kralen” and “Buizen”. In this article, we will explore the creation process behind the 'Buizen' algorithm—a project inspired by the exploration of (arc) tangent math. By the way, this is also my genesis fx(text) - lets dive in!
Disclaimer: I’m not that advanced in mathematics terminology so I probably use the wrong words sometimes. I try to use the terminology that sounds right to my ears but please feel free to provide any feedback or corrections.
How it started
The first seeds of the ‘Buizen’ project were planted last November ‘22. I needed to dive into tangent math for my ‘Warcler’ algorithm. Tangent math, for me, is about finding tangent points between circles and/or points. I watched a bunch of technical drawing videos about tangents by Arthur Geometry and translated the techniques used in the videos into code. For my ‘Warcler’ project I needed only a tiny fraction of the newly learned techniques, I found it unsatisfying to leave the rest unexplored. Therefore I started sketching out ideas for compositions where circles are joined with arc tangent math.
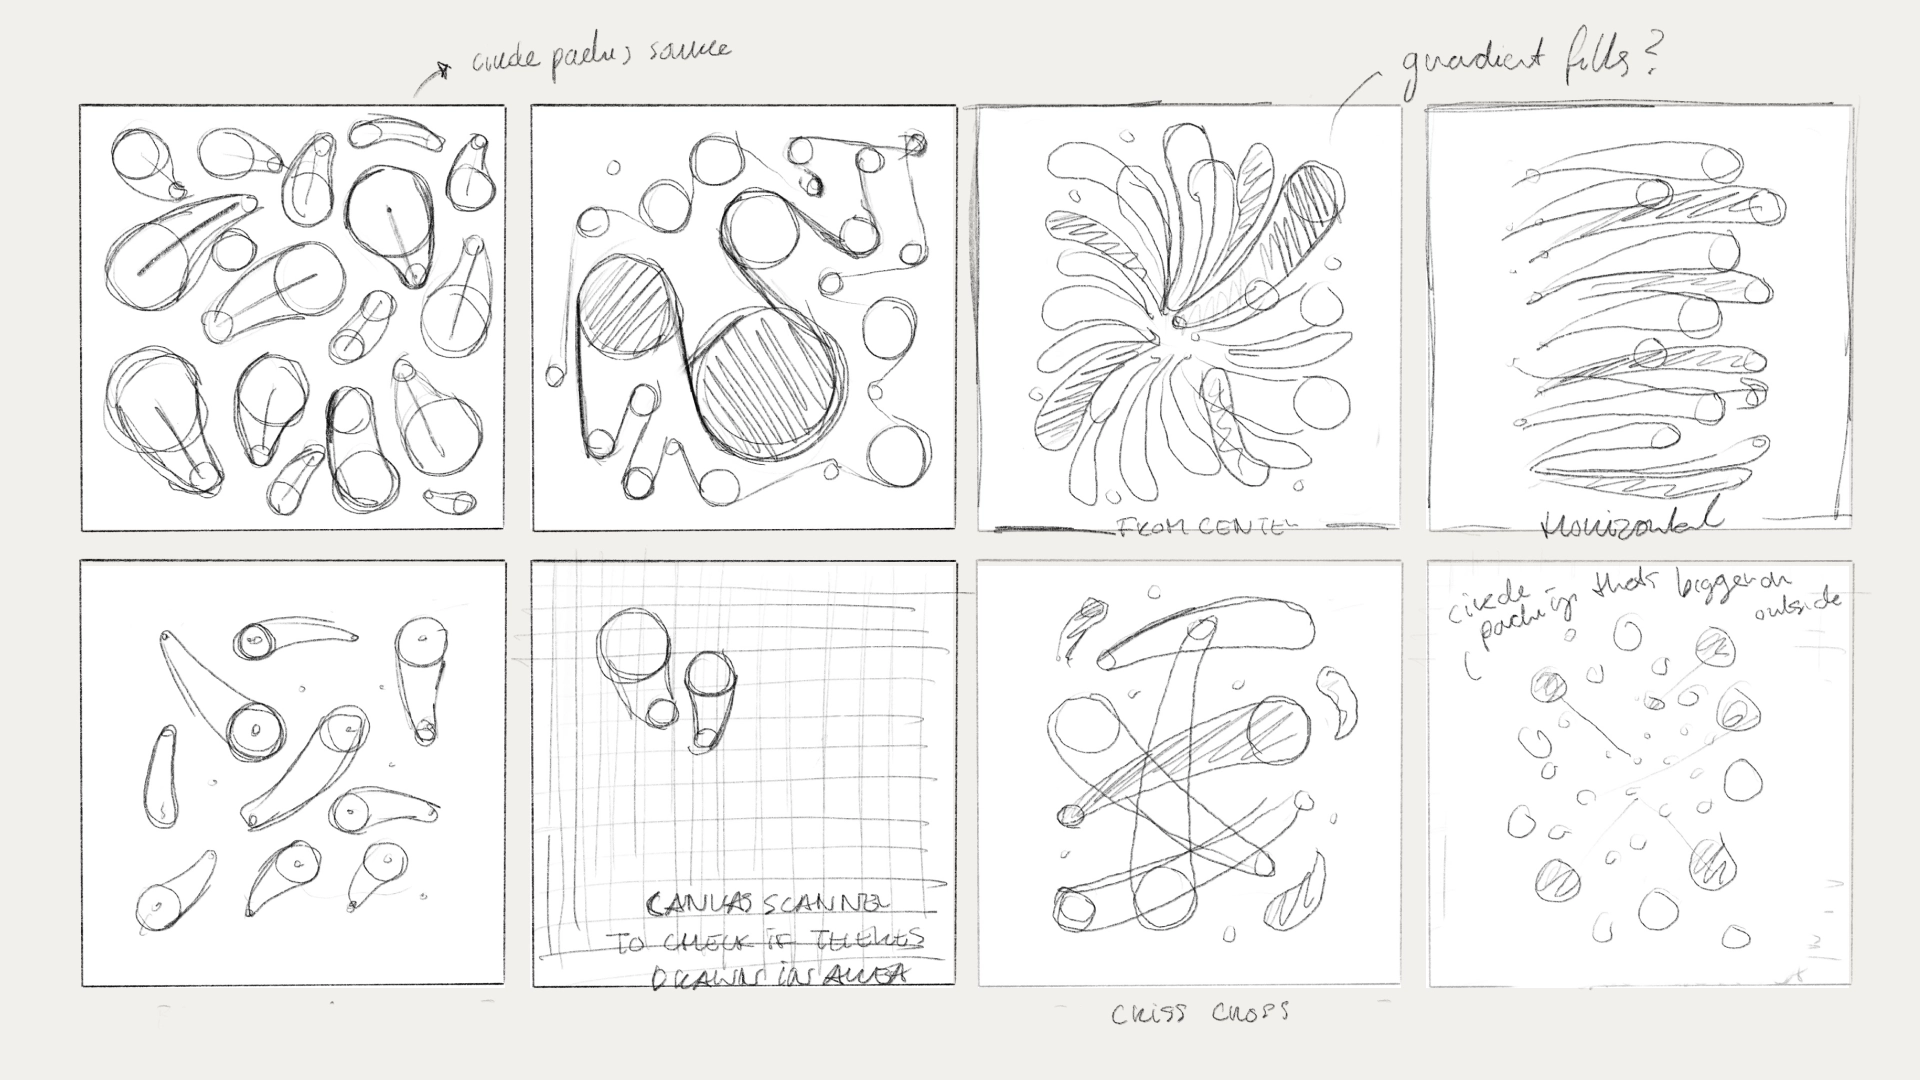 Initial sketches of connecting circles with arc tangent math
After I got several ideas of what I wanted to create I chose one direction (third of bottom row) and started translating it into code. From here on the article won’t be chronological but I’ll explain the important steps that I took to create the ‘Buizen’ algorithm. Therefore the article is split into two parts, one part about creating the tube like shapes and the other part about creating compositions of shapes.
Starting with creating the base shape
The tube-like shapes of “Buizen” may look sophisticated but the techniques used and steps taken are actually pretty straight forward. Let’s start with the basics, creating a tube like shape. For this I create two circles which I connect to each other by finding the tangent arcs. This is accomplished by finding two tangent arcs that encompass the circles, as well as two tangent arcs located between the circles. In the animation below I visualised the steps that I took to create the shape.
Animation: Joining two circles with arc tangent math
Steps
- Find the two tangent arcs that encompass the two circles (the 'outer' arcs).
- Find the two tangent arcs that are located between the two circles (the 'inner' arcs).
- Select one inner arc and one outer arc.
- Create a shape using the two circles and two arcs.
- Voilà! We now have an intriguing shape.
Adding shading
Connecting two circles with arcs doesn’t create a shape that resembles a tube. Right now it produces a flat shape that resembles some kind of paint stroke or cat tail. To create the illusion of a tube I needed to incorporate shading to add depth. In my previous project, 'Kralen,' I used a hatching technique that involved drawing multiple arcs inside a circle to achieve a shading effect. For the 'Buizen' project, I adapted this technique by drawing the arcs along the curve of the shape. The animation below demonstrates the steps that I took to create the arc hatching.
Animation: Adding shading to create a tube like shape
I began by extending the tangent arcs that connect the two circles, creating a two longer curves. These tangent arc curves were then transformed into bezier curves, enabling me to calculate an average bezier curve between the two curves. I called this curve the ‘spline’ of the shape. With the spline in place, I could traverse along its path for a specified number of steps. At each step, I derived the position and orientation, allowing me to accurately draw the arcs.
The find the positions along the curve I implemented bezier.js’ get(t) function which returns the position for value ‘t’ within the range 0 - 1. Once I obtained the position for a specific 't' value, I used the bezierTangent(t) method from p5.js to calculate the angle at that particular point on the curve. This angle information enabled me to rotate the arcs accordingly, aligning them with the curve's curvature.
To give the shape a more realistic tube-like appearance, I added a hole on the larger side of the curve.
Steps
- Extend the joining arc curves
- Find the average curve between the two arcs, the spline
- Calculate the positions along the curve
- Find the tangent angle of the positions
- Draw shading arc
- Draw hole on the larger end
Generating interesting compositions
Part two of this article is about creating interesting compositions using the tube-like shapes. During the sketch phase I always started a sketch by first drawing circles on the canvas and then connecting them to each other using various rules. To translate this idea into code I first implemented a simple circle packing algorithm. This algorithm generates non-overlapping circles on the canvas, resulting in a visually balanced distribution of circles.
The next step was making random pairs of circles and joining them with the previously mentioned arc tangent math. The animation below demonstrates the steps that I took to create the composition of tubes.
Animation: Adding shading to create a tube like shape
Adding more variation
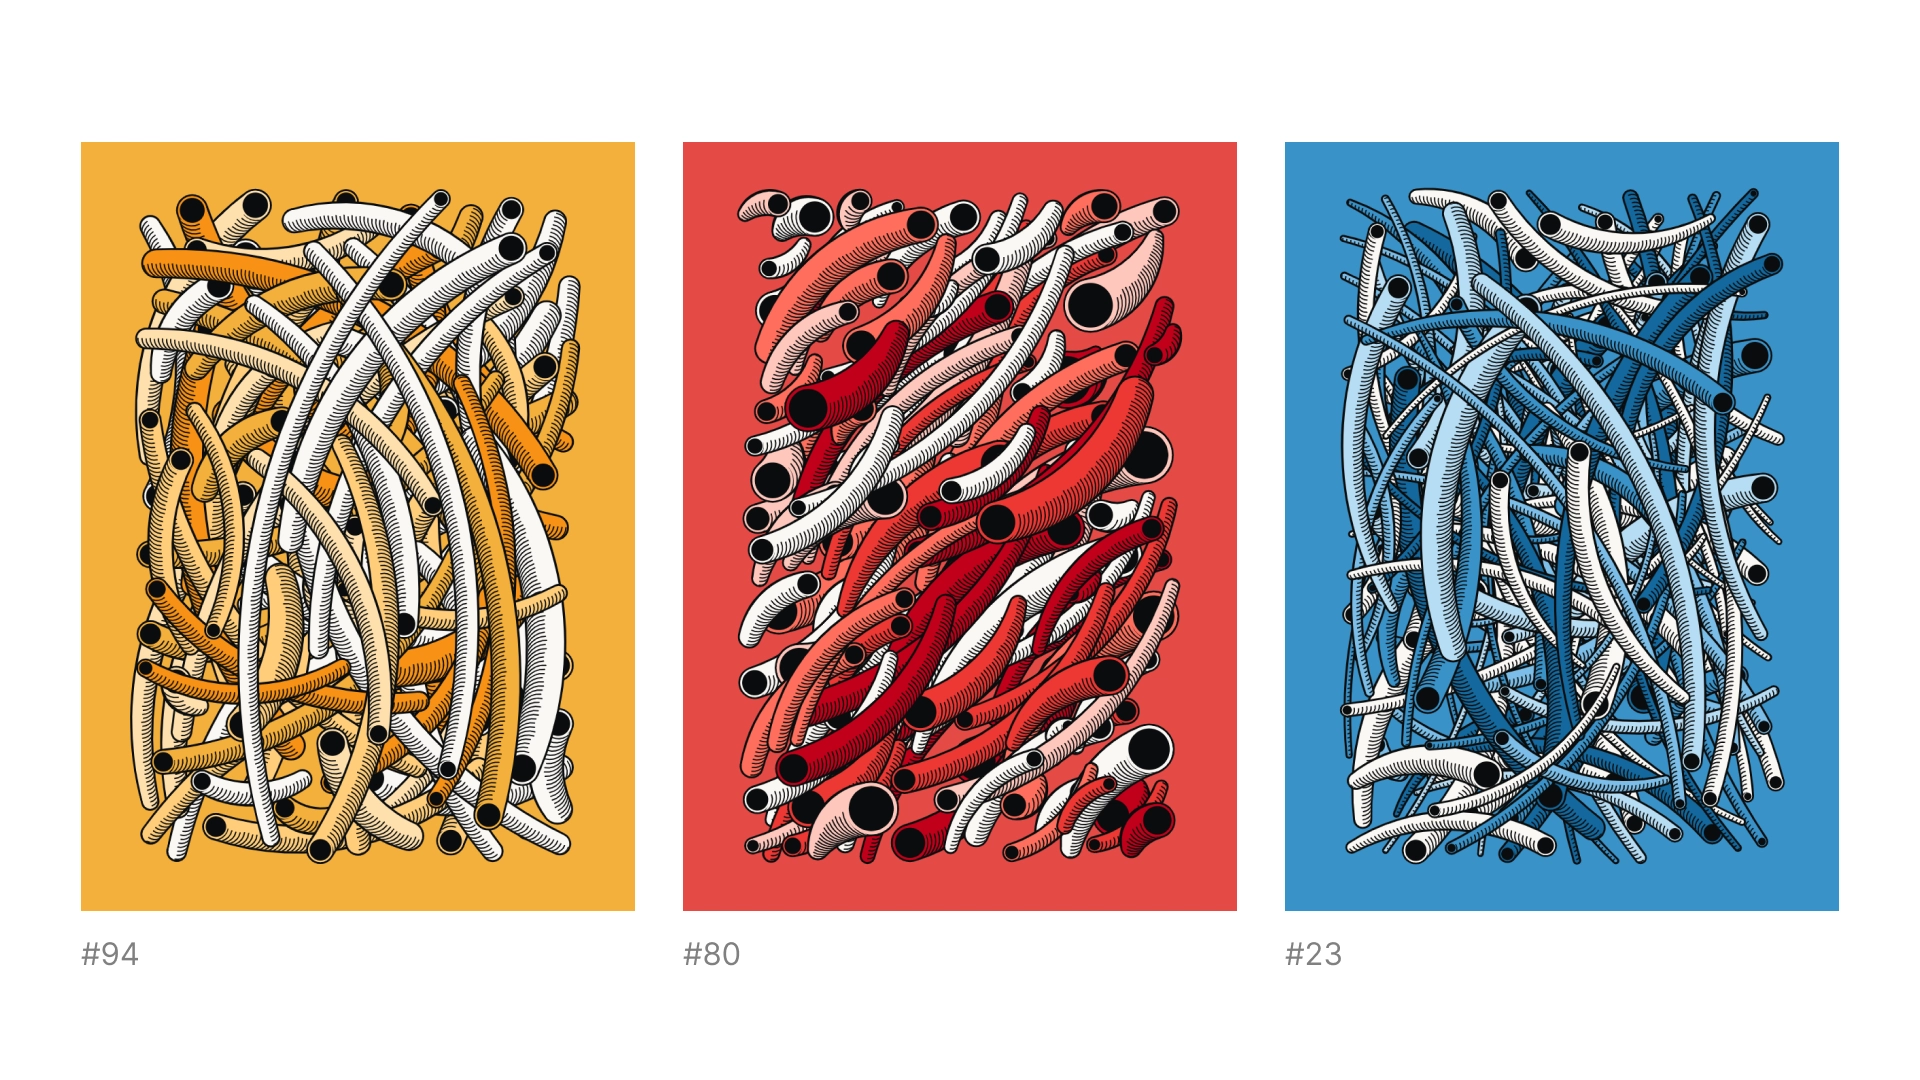
Once I had the basic algorithm implemented in my code, I started exploring ways to add more variation to the outputs. The algorithm already had some built-in variation thanks to the random sizing of the circles. When the circles were small, things could get pretty chaotic, resulting in a bunch of interconnected tubes. On the other hand, using larger circles gave a more minimalistic vibe with just a couple of standout tubes.
 Buizen Editions - Variations in circle sizes
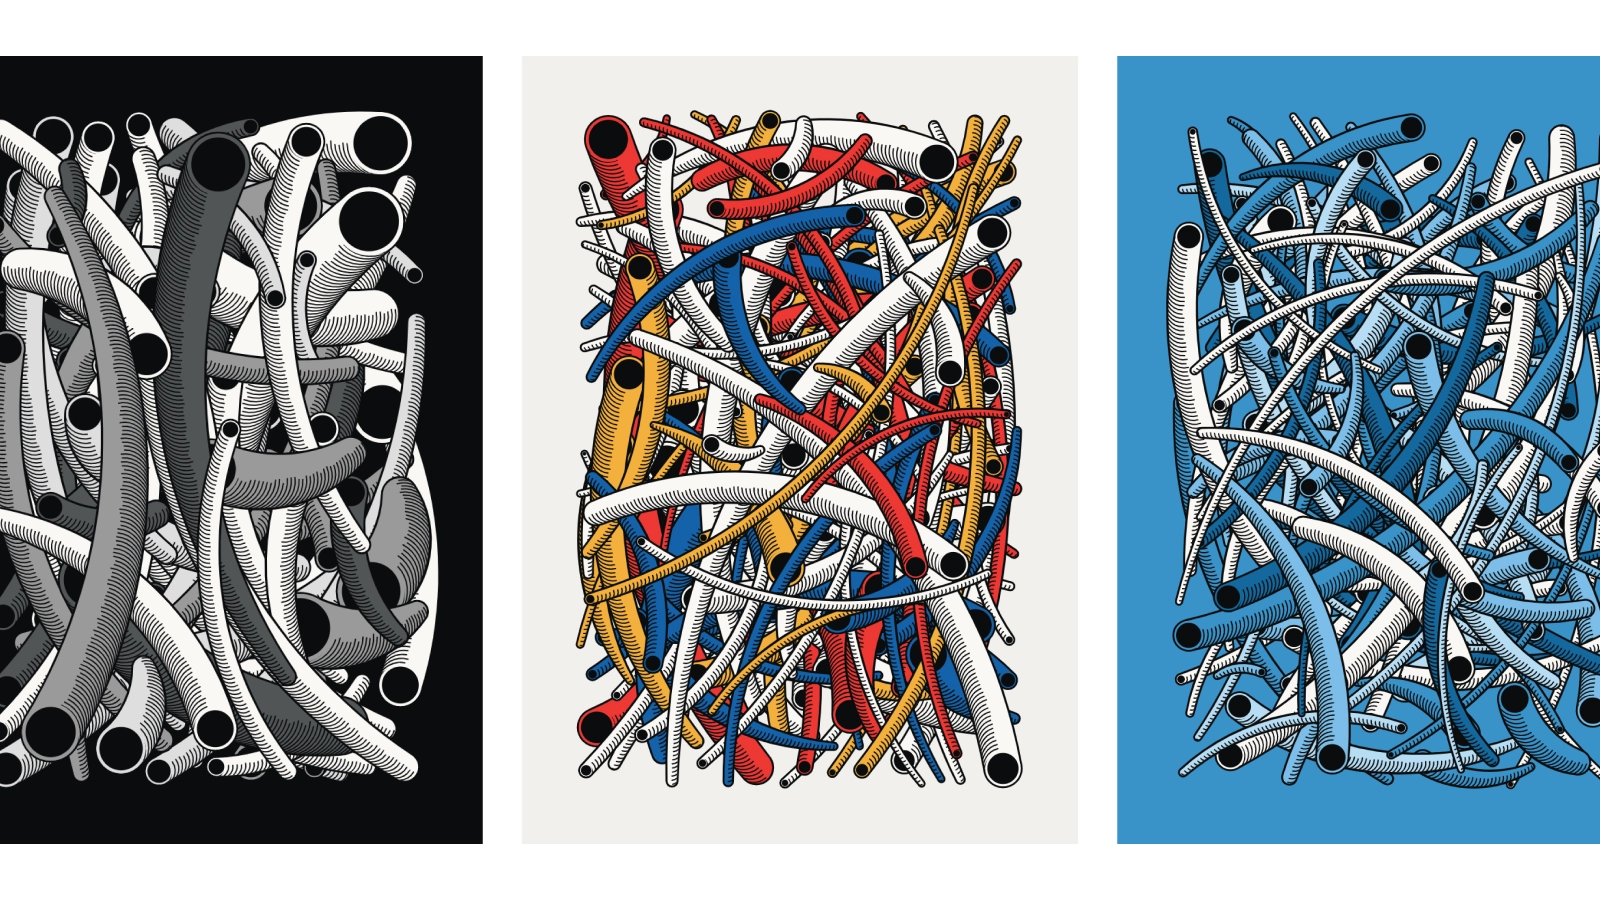
In my previous project, I stuck to using only one color palette. But for this new project, I wanted to spice things up and have more color options. I tried out a bunch of different palettes, handpicking each one, but I kept coming back to primary colors and monochromatic schemes. There was just something about those palettes that felt right to me.
 Buizen Editions - Yellow, Red and Blue
To further enhance the variety, I introduced two new ways of pairing circles. Initially, pairs were made randomly, resulting in compositions that sprawled across the canvas. But then I had a thought — why not pair circles that were close to each other? This approach led to compositions with smaller tubes and more empty spaces. Additionally, I discovered that I could pair circles in the same direction. Take a look at editions #112, 116, and 117 of Buizen below, each showcasing one of the three pairing methods.
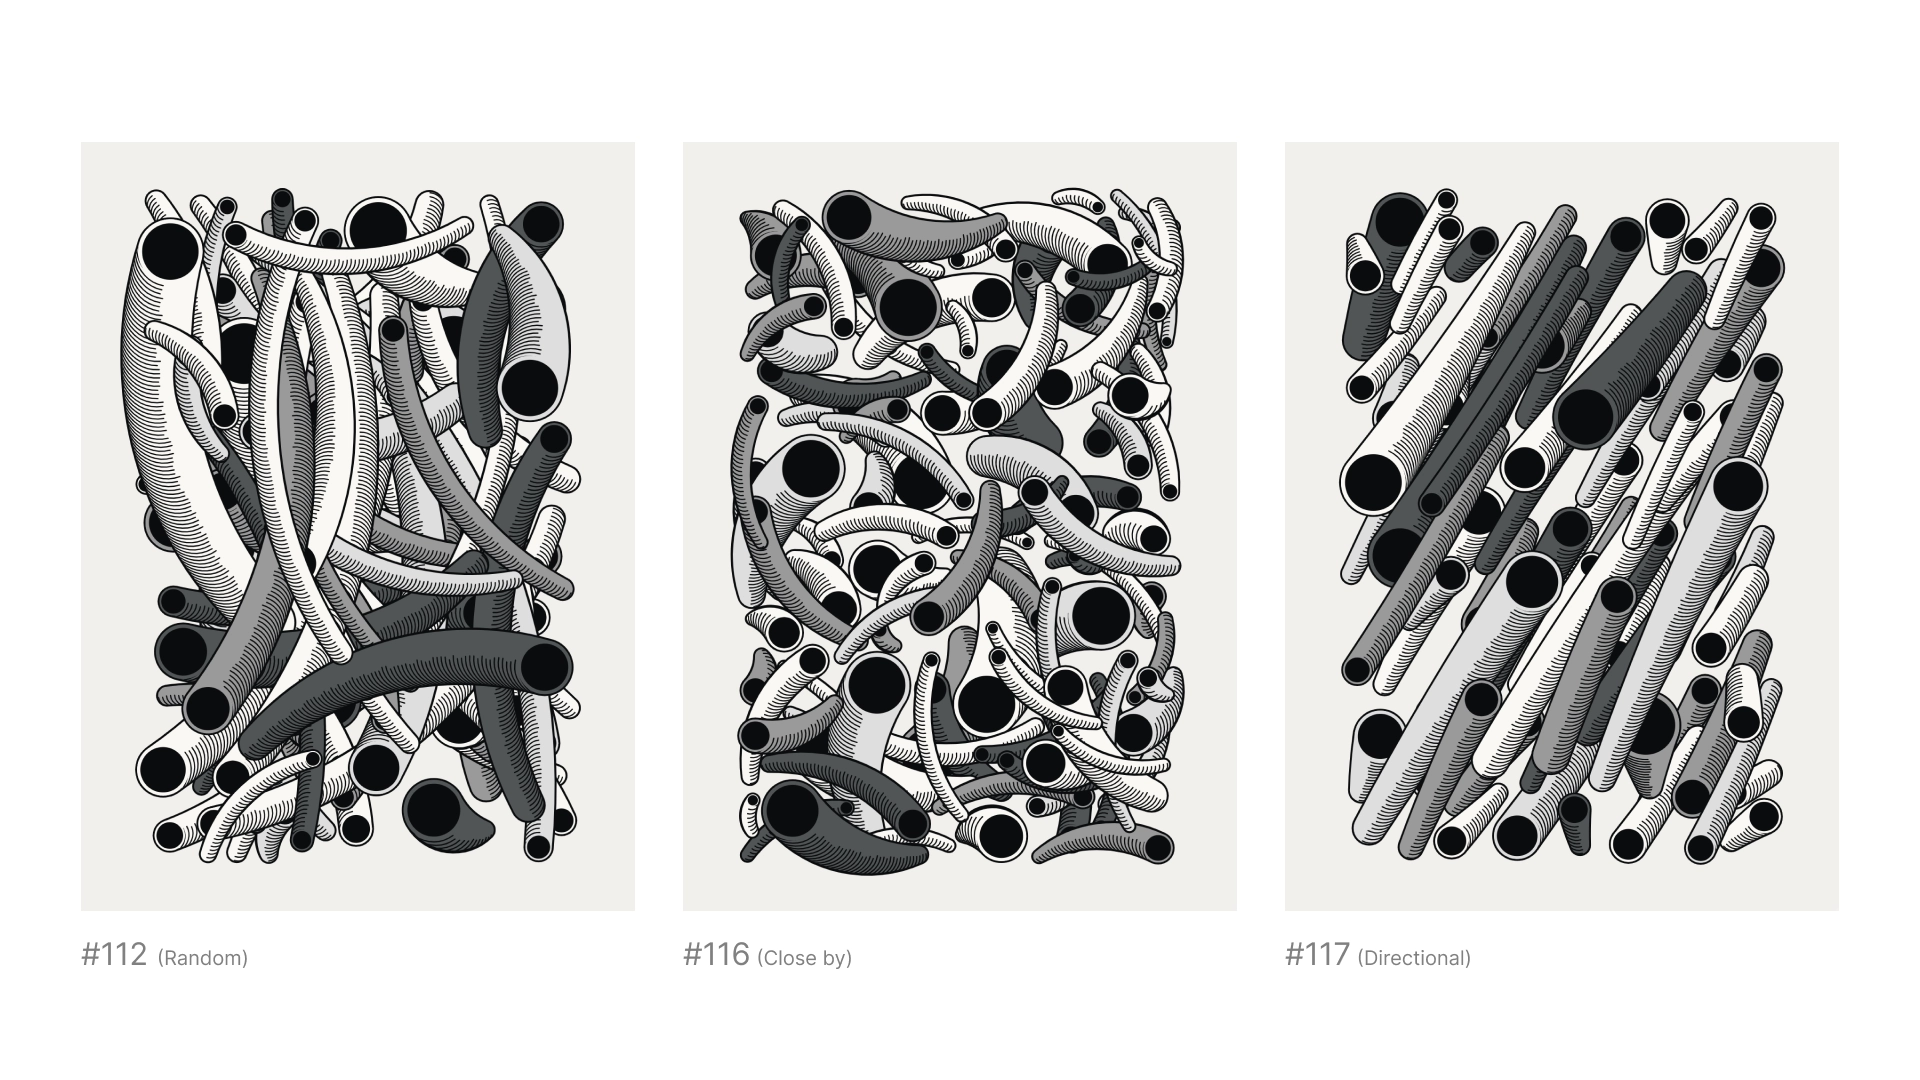 Buizen Editions - Variations in circle pairing
And finally, I decided to play around with the curviness of the tubes. Sometimes, it reminded me of a bamboo forest (#74) with all those graceful curves, while other times, straight tubes sparked memories of the game Mikado (#6).
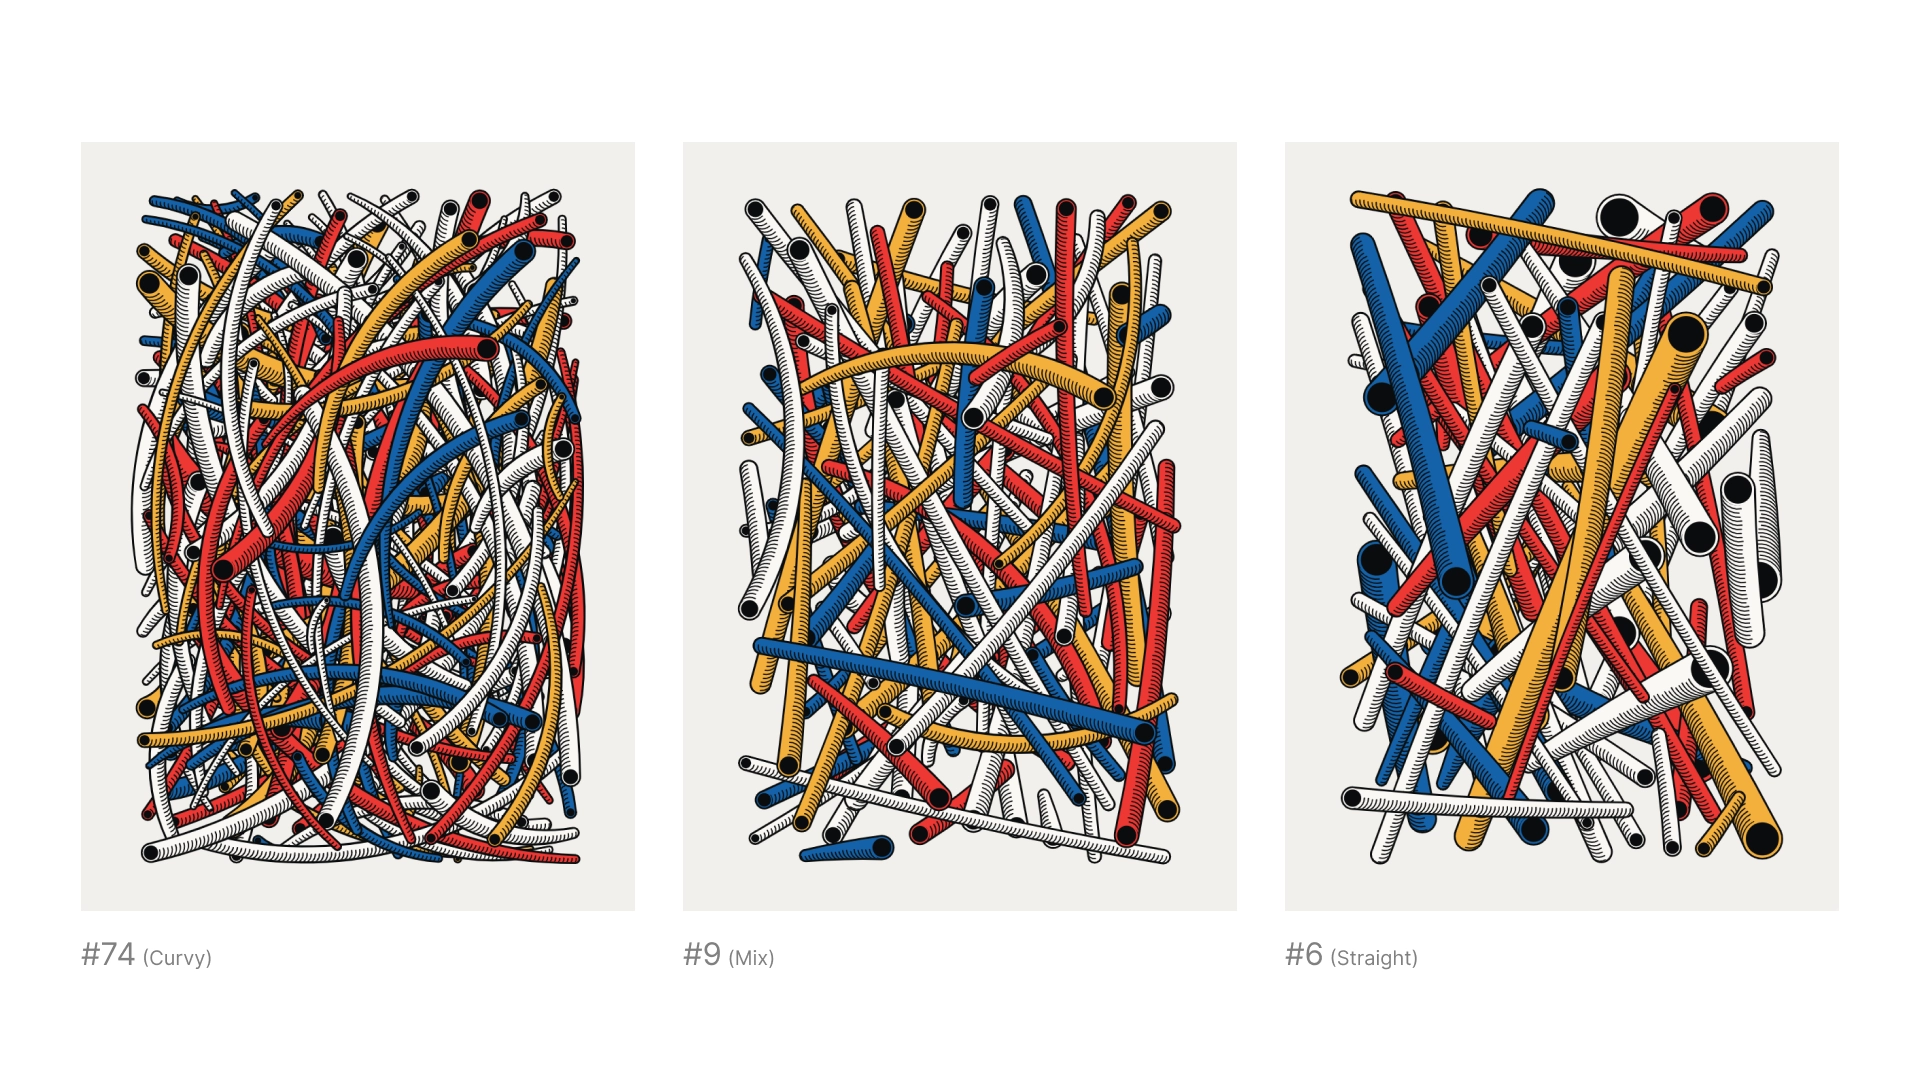 Buizen Editions - Variations in curviness
Finishing words
I hope this gave you some insight into the inner workings of my ‘Buizen’ algorithm. As of now, there are still some mints left, so you can still get your edition ;)
If you want to keep up to date with work in progress shots be sure to follow me on Twitter, Instagram or Pinterest.
If you have any questions, ideas or remarks please let me now via mail/socials/direct messages - you name it ;)
Originally published on fxhash on April 27, 2023.