
Most of my art is a result of me experimenting with new techniques. For my latest piece - Granular C - I was figuring out how I could make my art feel like it wasn’t created by a computer anymore. In this post I explain how I created the grainy rendering technique used in Granular C.
The spark
It all started when I saw the work Screens of Thomas Lin Pedersen. In particular my eye fell on the grainy way the gradients were rendered. On his website Thomas mentions that he focused on a gradient rendering technique of mimicking screen printing. I really liked the look and feel of it and wanted to master this technique so I could use it for my own art.
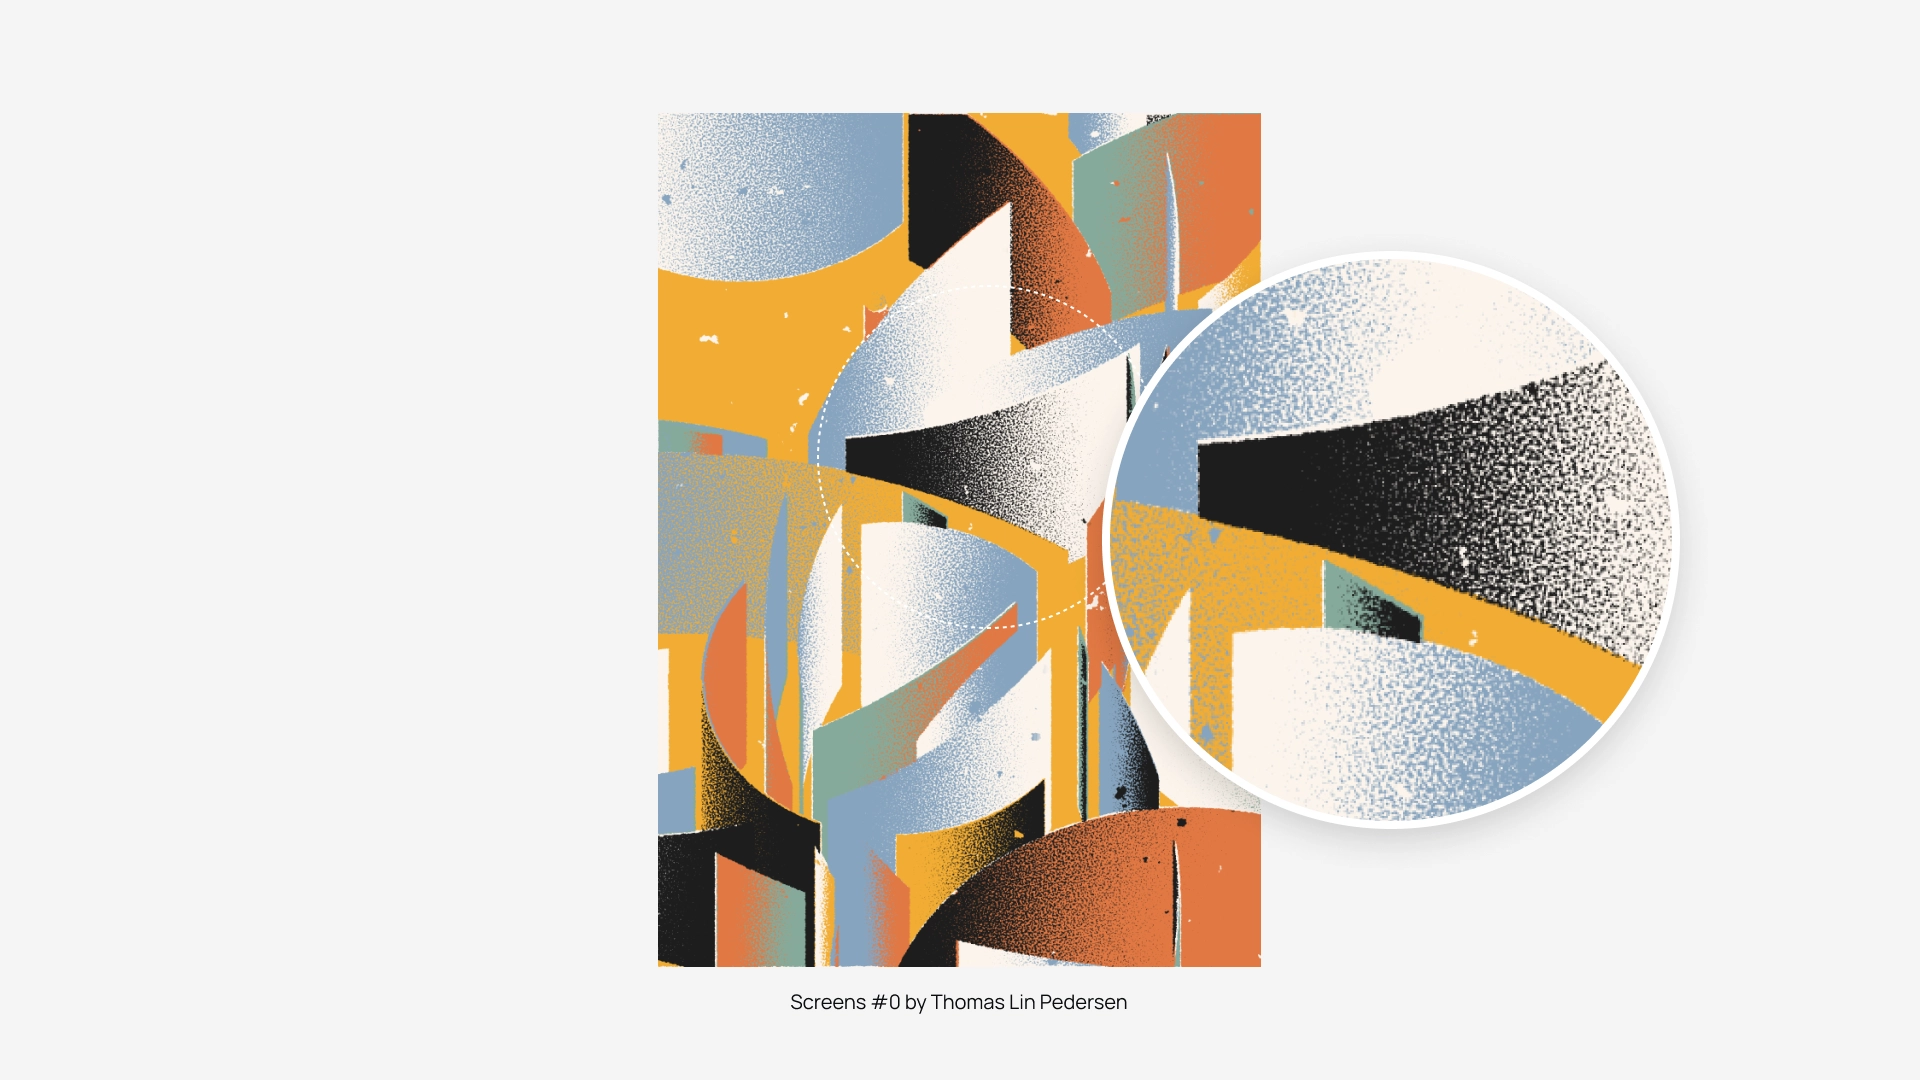 Screens #0 by Thomas Lin Pedersen (Zoom on the gradient rendering)
Analysis
I started with studying the gradients up close to see how I could recreate it and noticed two things:
- The gradient existed out of many random points (possibly generated with noise)
- The closer a ‘random’ point is to the lighter area of the gradient the smaller the chance of displaying the point and also its size seems to be decreasing.
I came up with a plan to first generate a normal gradient. Then I would generate a bunch of uniformly distributed random points within the gradient’s bounds. For each random point’s location I’d check the gradient equivalent color pixel and read its brightness value. Depending on its brightness I’d decide the size of the point and the chance of it being actually drawn to the screen.
Let’s start coding in Processing Java.
When I was doing some more research for this post I came across the webpage of Screens where Thomas actually explains more about the various techniques used for this piece. You need to scroll down a bit to get to know more about the details. Be sure to check this page out - a lot of cool stuff over there!
Step 1: Generating a gradient
Generating a linear gradient in Processing can be done with the lerpColor() function but in this case I used a library called PeasyGradients by Michael Carlton. The library isn’t officially released yet but you can grab a release on Github. PeasyGradients saves you the trouble of creating your own gradients via pixel manipulation or drawing calls and also provides you with a lot of extra functionalities like types of gradients and interpolation modes. Creating a gradient goes as follows:
// Import library
import micycle.peasygradients.*;
import micycle.peasygradients.gradient.*;

void setup () {
	size(320, 320);
	colorMode(HSB, 360, 100, 100, 100);

	// Initialize library
	PeasyGradients peasyGradients = new PeasyGradients(this);

	// Create a gradient object
	Gradient gradient = new Gradient(#000000, #ffffff);

	// Create a PGraphics container
	PGraphics gradientFill = createGraphics(320, 320);

	// Draw the Gradient onto the PGraphics
	peasyGradients.setRenderTarget(gradientFill);
	peasyGradients.linearGradient(
		gradient,
		HALF_PI
	);

	// 5. Draw the gradient to the screen
	background(#ffffff);
	image(gradientFill, 0, 0);
}
Code example of creating a gradient with PeasyGradients
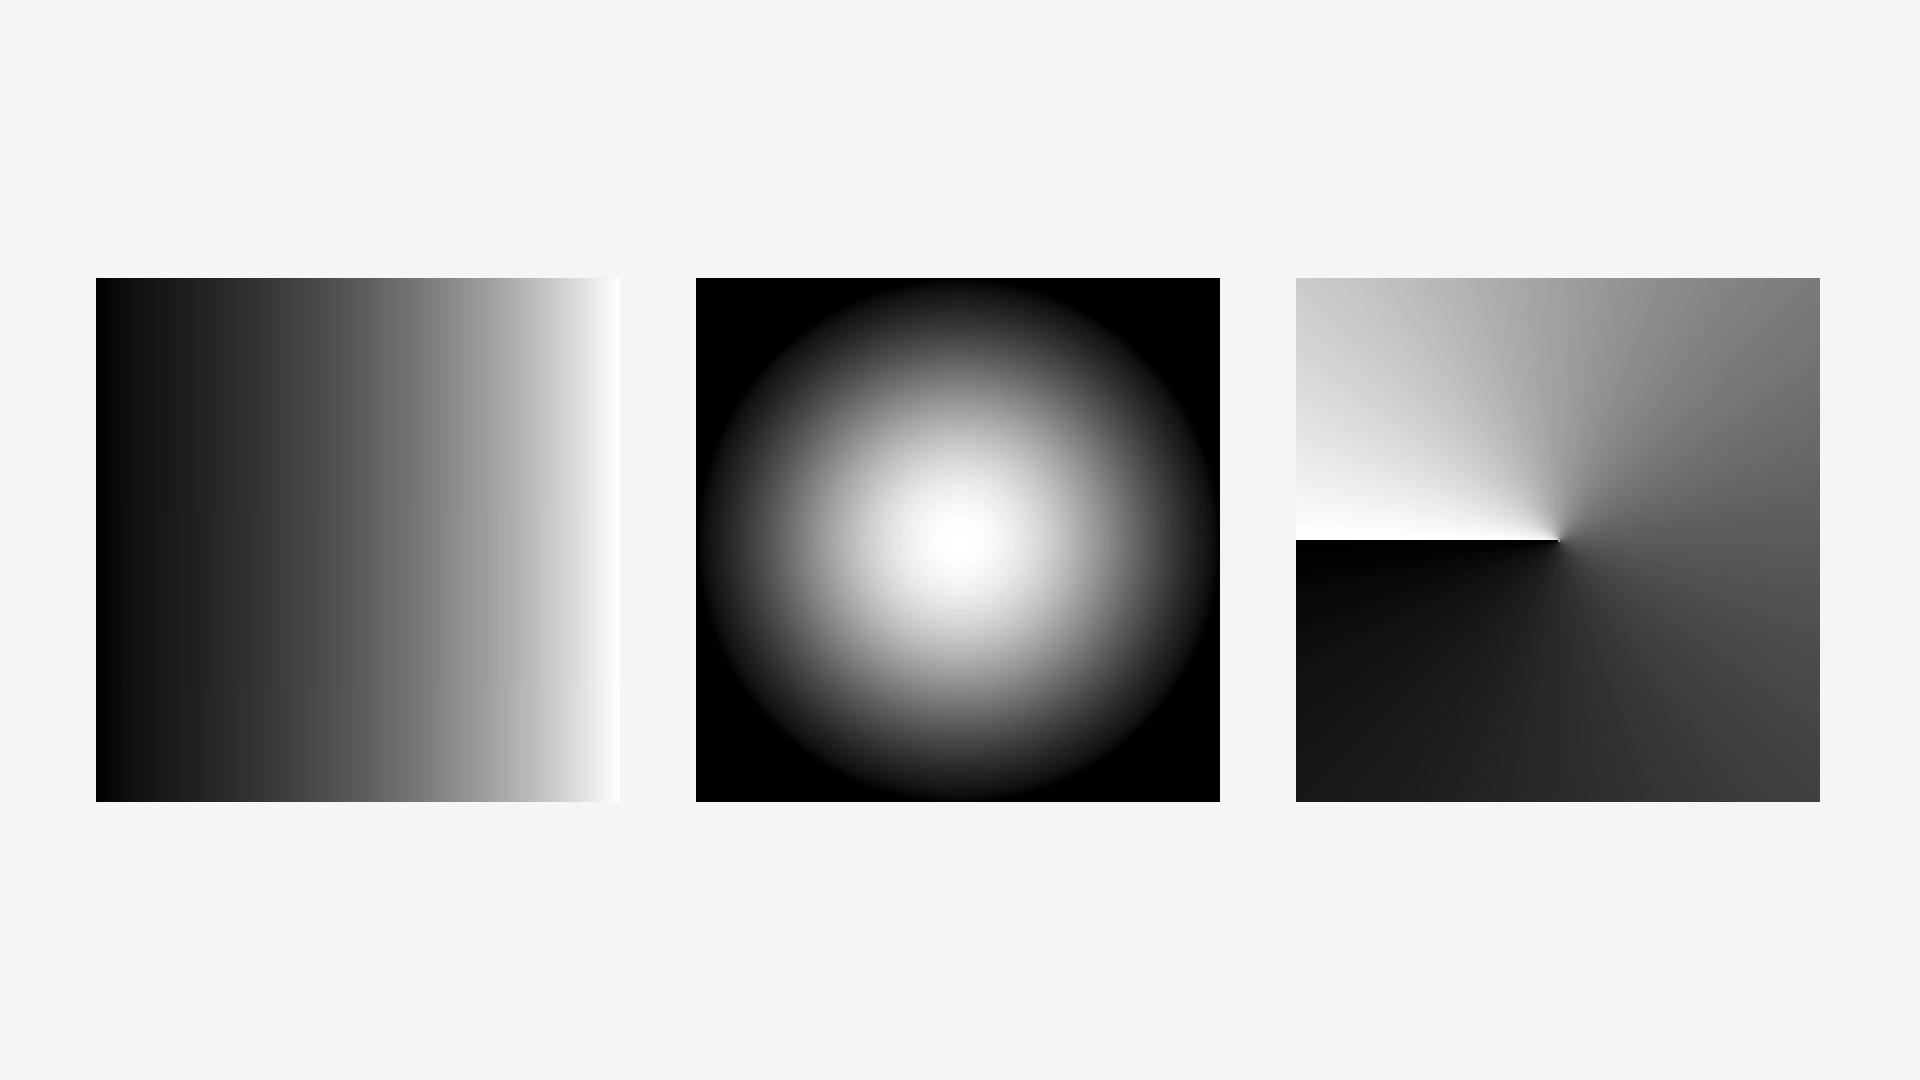 A linear, radial and conical gradient generated with PeasyGradients
Like mentioned before the library isn’t officially released yet and sometimes it could give some unexpected results. If you come across a bug you can create an issue on PeasyGradients’ Github page and you’ll help Michael to improve the library ;)
Step 2: Creating random points
Next I need to create random points within the area of the gradient. You could use Processing’s random() or noise() functions but since I wanted to generate a lot of points I thought of trying something more quicker - the Halton sequence. A quasi-random number sequence which can give you uniformly distributed points pretty fast. I can't wrap my head around how this functions works but more info about it over here ;).
float halton(int _index, float _base) {
  float result = 0;
  float f = 1 / _base;
  int i = _index;

  while (i > 0) {
    result = result + f * (i % _base);
    i = floor(i / _base);
    f = f / _base;
  }

  return result;
};
The Halton sequence function written in Processing
To actually create points (x and y) within an area I created the following function where I pass the PGraphics of the gradient so I could get its dimensions. A density variable influences the amount of points to generate.
void drawPoints (PGraphics _input) {

  float density = 0.5; // influences amount of points

  // Get dimensions
  int w = _input.width;
  int h = _input.height;

  // Calculate the amount of points to generate (area)
  int area = round( (w * density) * (h * density) );

  for (int i = 0; i < area; i++) {
    // Use the Halton sequence (0 - 1) with a differennt base for x and y
    float x = halton(i, 2) * w;
    float y = halton(i, 3) * h;

    // Draw point
    noStroke();
    fill(0, 0, 0);
    ellipse(x, y, 2, 2);
  }
}
Drawing random points within an area
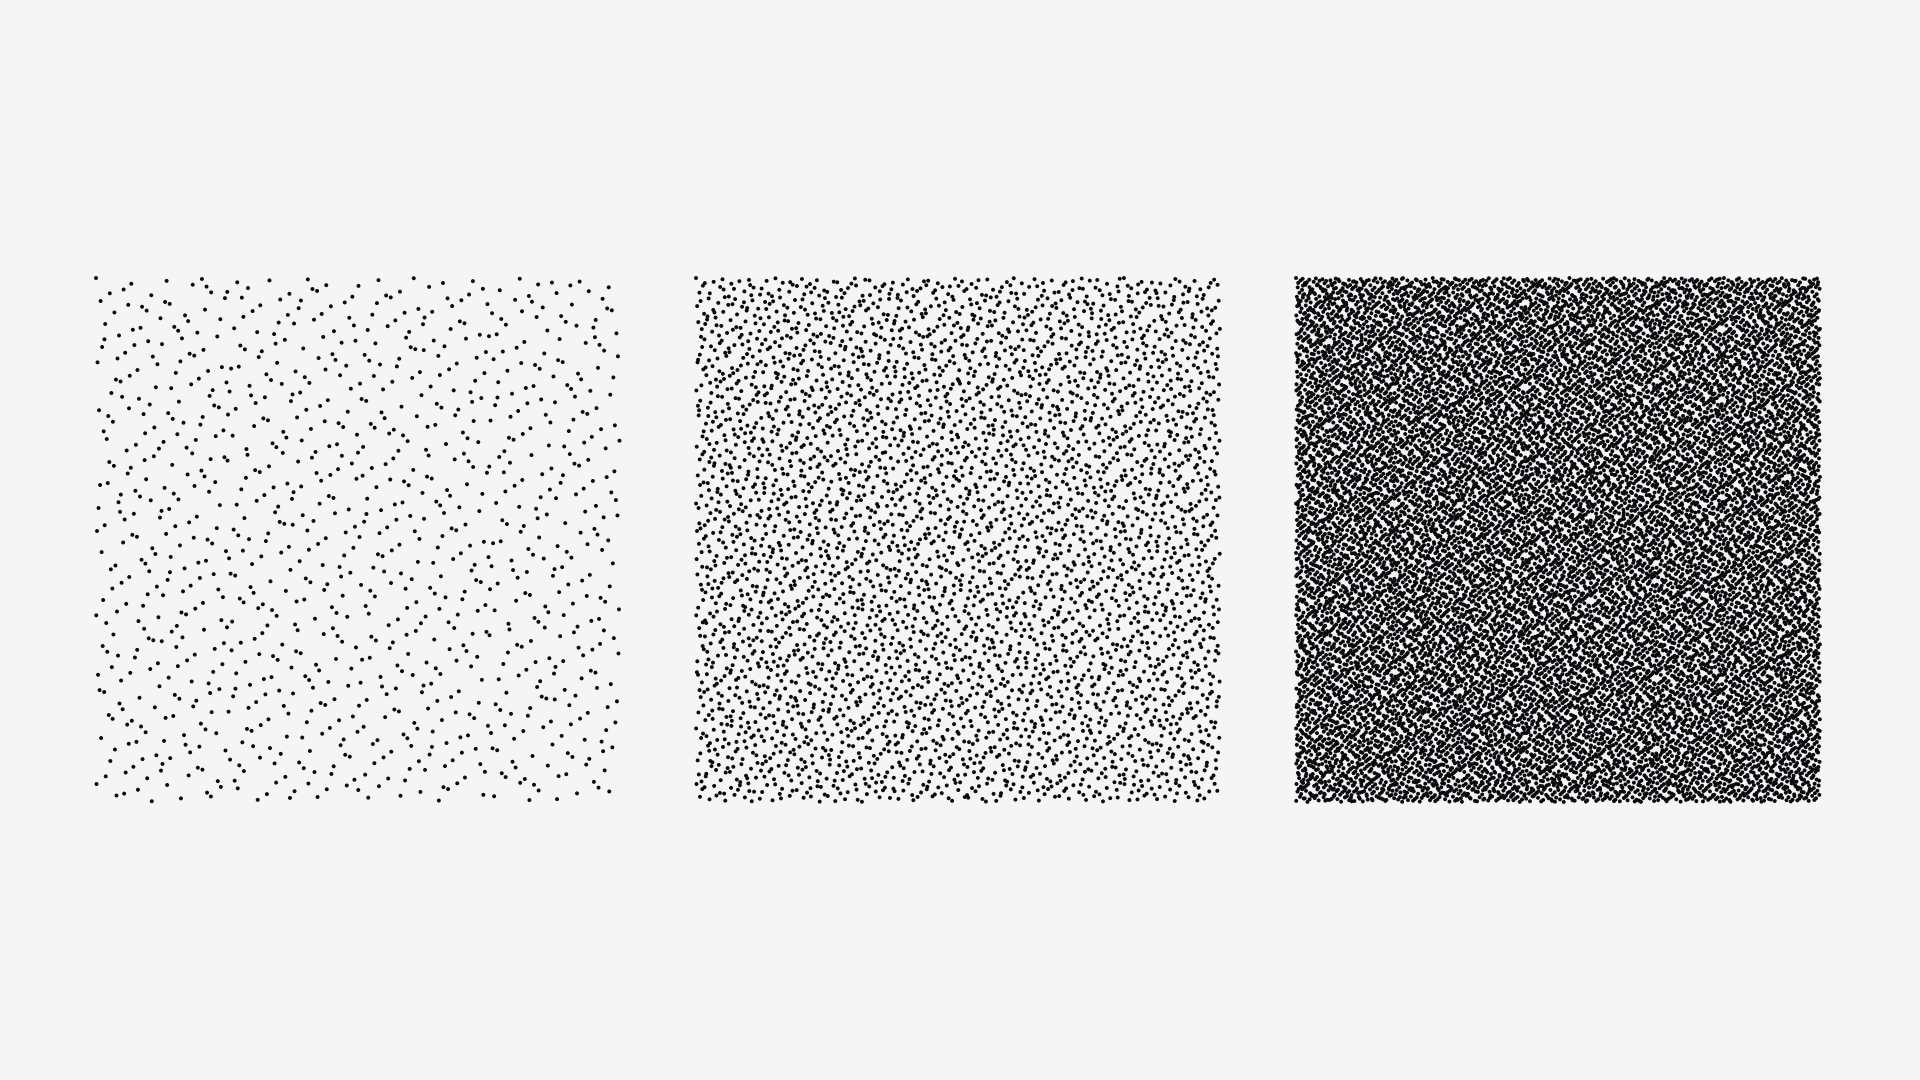 Points created by using the Halton sequence at various densities
In the picture above you can see that the Halton sequence isn’t truly random I have a fix for that in the next step.
Step 3: Convert to grain
The last step is to use the gradient of step one to influence the drawing of random points of step two. For each possible point we want to check the corresponding gradient’s pixel brightness. The brightness will influence the size and chance of the point being drawn. Points on the lightest side of the gradient should have a tiny chance of being drawn and must be very small. Points on the other end would get a larger chance of being drawn and also have a bigger size.
See the code below where I’ve added the functionality and put some comments to explain things.
void convertToGrain (PGraphics _pg) {

  float dotSize = 4; // influences max size of dots
  float density = 1; // influences amount of points
  float threshold = 0;

  // Get dimensions
  int w = _pg.width;
  int h = _pg.height;

  // Calculate the amount of points to generate (area)
  int area = round( (w * density) * (h * density) );

  // Loop over area
  for (int i = 0; i < area; i++) {

    float x = halton(i, 2) * w;
    float y = halton(i, 3) * h;

    // Read color data
    color c = _pg.get( floor(x), floor(y) );

    // Continue loop if the pixel's alpha = 0
    float alpha = alpha(c);
    if (alpha == 0) continue;

    // Based on brightness draw specks
    float b = brightness(c) / 100; // I use colorMode(HSB, 360, 100, 100);
    b = map(b, 0, 1.0, 0, 1.0 - threshold);

    // Adjust size based on brightness
    float offsetSize = dotSize * (1.0 - b);

    // Pick a random number and check against brightness
    if (random(1) >= b) {
      speck(x, y, (offsetSize / 2)); // random polygon
    }
  }
}
Converting a PGraphic input layer to grain
Note: In my project I actually don’t draw a point or an ellipse but I generate a what I call a ‘speck’ which is just a random polygon.
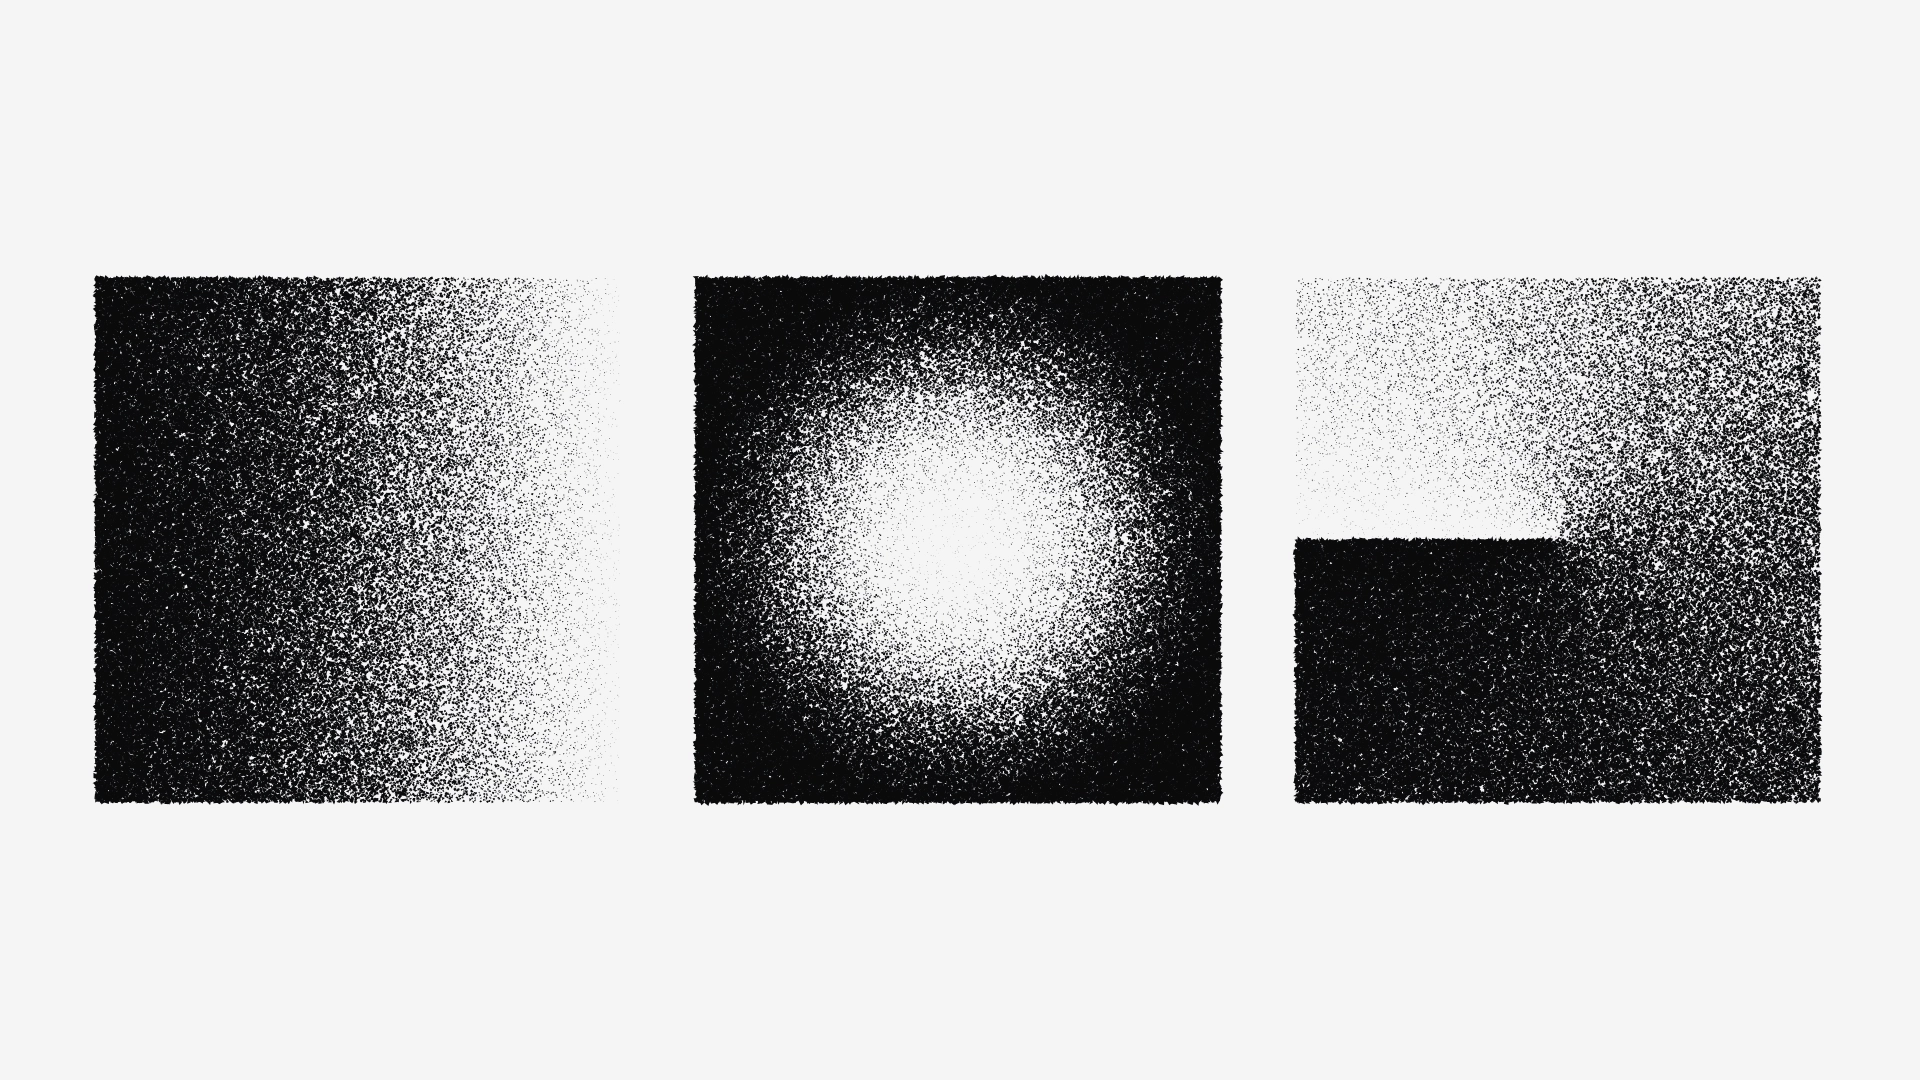 Grainy rendering of various gradients
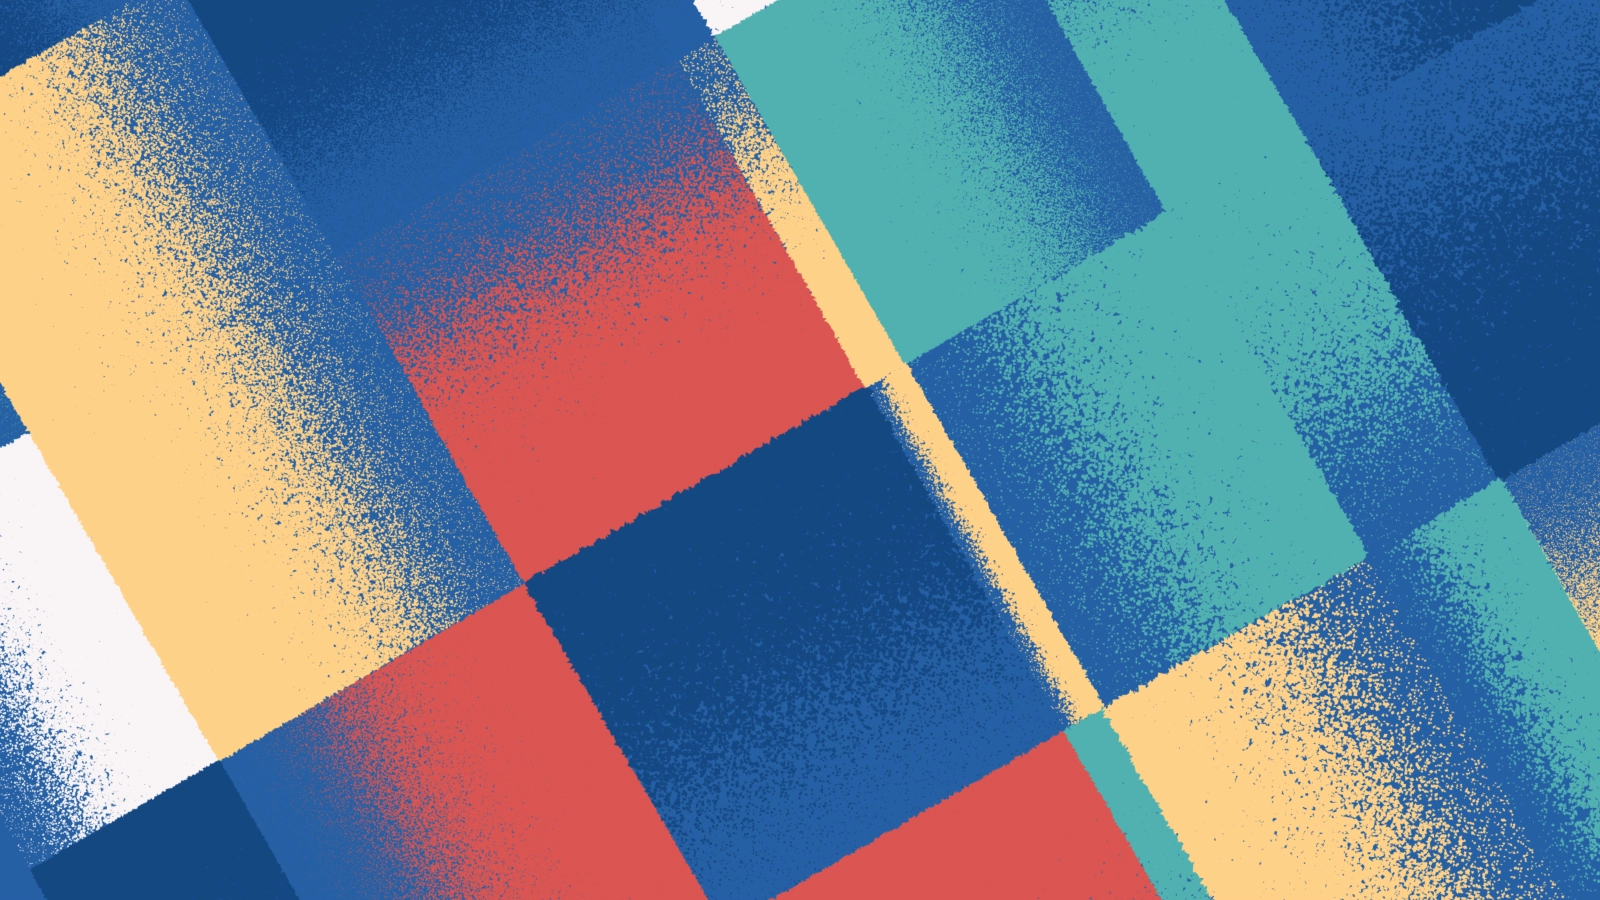
Algorithm: Granular C
Combining this grainy rendering technique with another experiment where I created Mondrian inspired grids resulted in a new algorithm - Granular C. In the nearby future I also want to launch a black and white variant hence the letter C (Color). You can get your personal edition of Granular C as a fine art print via my shop.
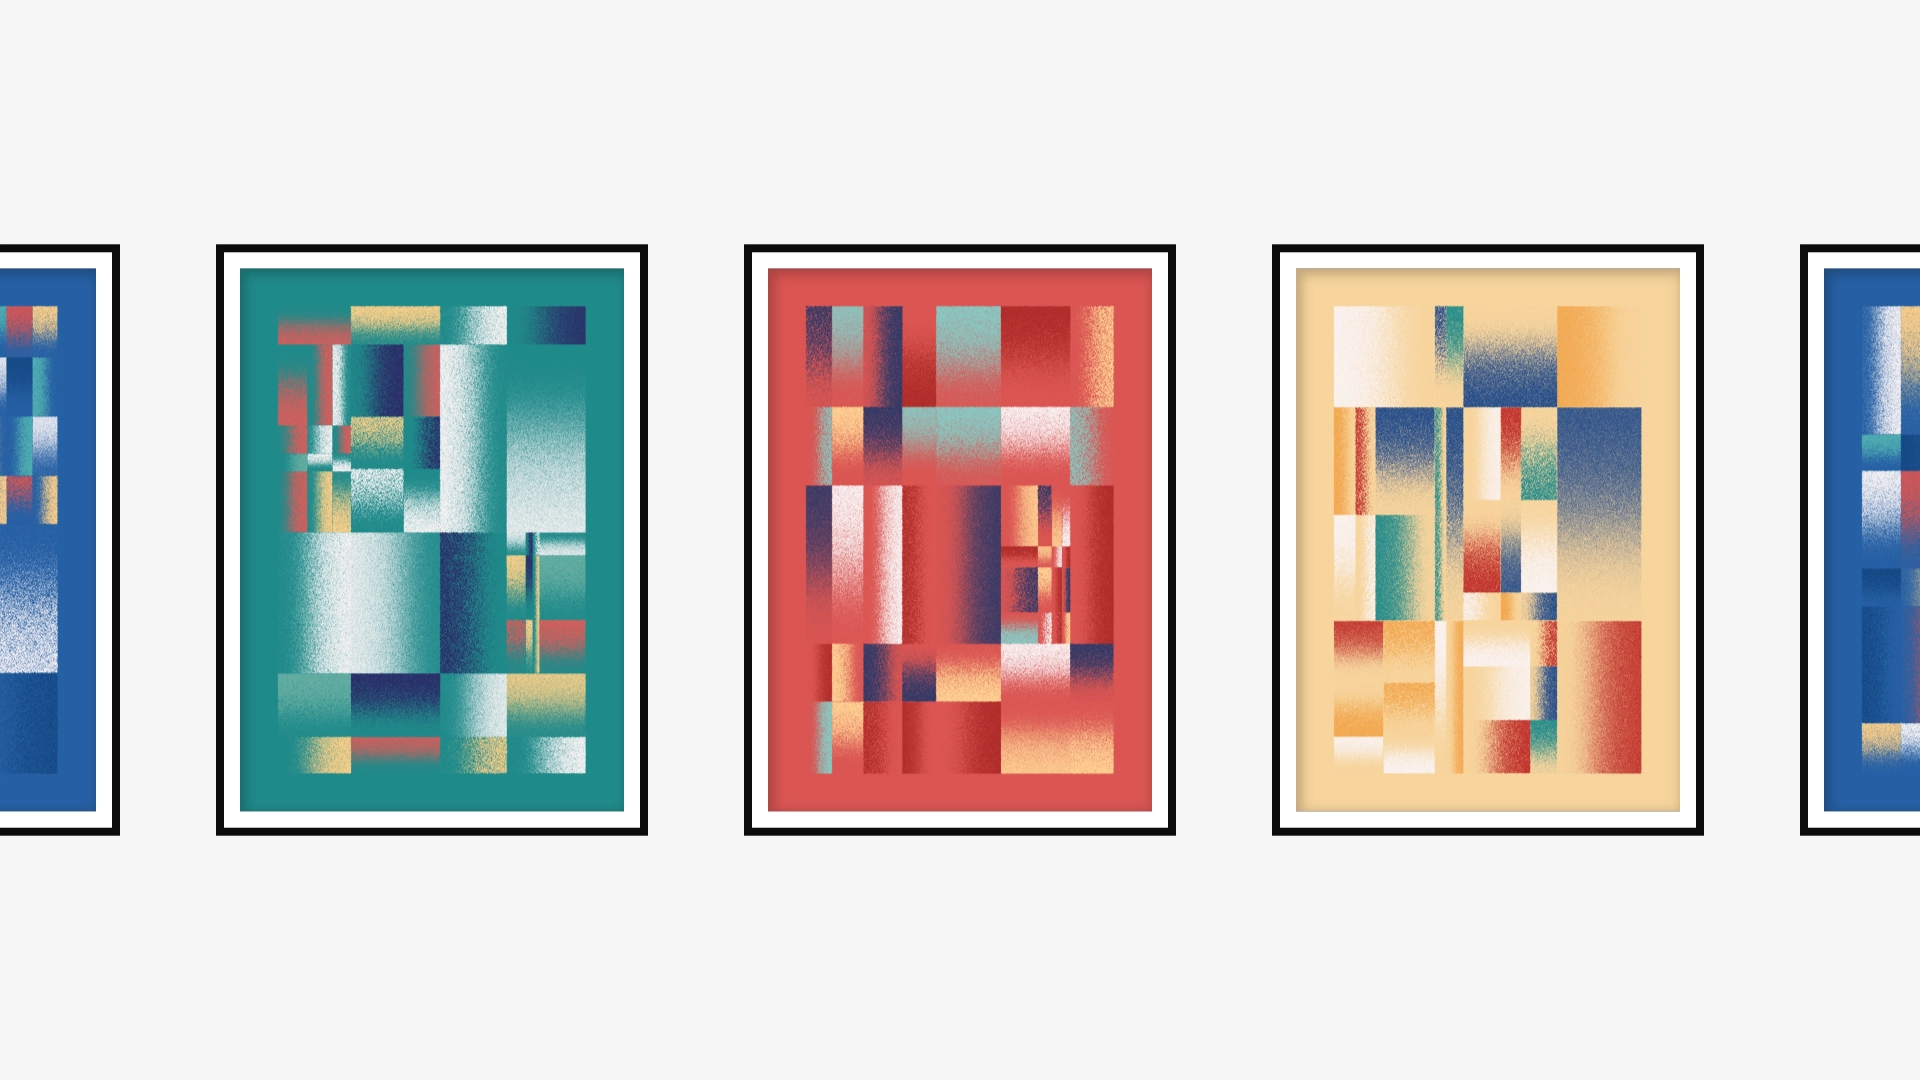 Various editions of the algorithm: Granular C
Closing thoughts
Looking back at my algorithm I’d probably didn’t need to generate a gradient and read its pixel data. Since I’m drawing linear gradients with straight angles I could use the x or y value to replace the reading of pixel brightness. But since it now works for other types of gradients as well I can re-use and adapt this code for future projects.
I hope this post gave you some insight in how I create my artwork. If you have any questions or remarks please let me know via e-mail or via DM ;)